• Skip to main content
Help Center

Help Center

Uncategorized

Configure the Database Connector 


Connectors facilitate easy connection to data sources, allowing you to retrieve the data (row) and/or schema information from the Enterprise Database.

The platform allows you to configure a database connector to establish connection with various database management. It enables seamless interaction between the platform and your designated data retrieval with the sequel queries. 

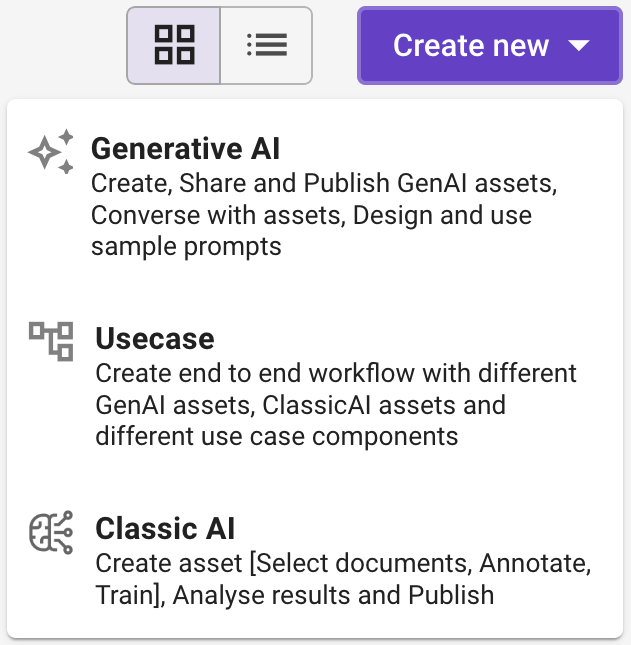
Users must have the Administrator Policy to configure the DB Connector. 

This guide will walk you through the steps on how to configure the DB connector.

  1. Head to the Administration module, choose Connections and then click Create New.


  2. In the Select Connector window that appears, select DB Connector.


  3. On the DB Connector page that appears, enter the following details:


  • In Connection Name, enter a unique and descriptive name for the DB connector.
  • In Database Type, enter the specific type of the Enterprise database that you wish to connect. Platform supports MySQL and PostgreSQL.
  • In Connection Url,  enter the database connection string, format varies based on the DBMS being used. See below the examples.
    • MySQL: jdbc:mysql://hostname:port/database?user=username&password=password
    • PostgreSQL: jdbc:postgresql://hostname:port/database?user=username&password=password
  • In Username , enter the database username. 
  • In Password, enter the database password.

Note: Ensure that the provided credentials have appropriate permissions to access the specified database.

  • In Connection Timeout, set the connection timeout value according to your application’s requirements and the expected network latency. Common values range from a few seconds. Enter the values are considered in seconds. 
  1. Double-check all the entered information and then click Submit.
  2. Your DB Connector is successfully configured to connect to the specified DBMS. Ensure that you have the necessary permissions to avoid connection issues. 


Note:

  • Always refer to the documentation of your database connector/library for specific configuration options and details.
  • Ensure that the provided connection parameters are accurate and secure to establish a successful connection to the database.


Content Ideation and Generation


AI-driven content creation, facilitated by Purple Fabric, has transformed writing and ideation in today’s world. Purple Fabric streamlines the content generation process by leveraging advanced machine learning to produce tailored and relevant content with minimal manual input. Additionally, it enhances ideation by analyzing vast data sets to identify trends and insights, fostering innovative thinking. Purple Fabric accelerates writing, improves creativity, and provides valuable insights, making it an indispensable tool for businesses and writers in today’s fast-paced digital landscape.

Users must have the Gen AI User policy to access the content ideation and generation capability.

This guide will walk you through the steps on how to ideate and create content with the help of Purple Fabric.

  1. Create an asset
  2. Select a prompt template
  3. Select a model and set model configurations
  4. Provide the system instruction
  5. Run the model and view results
  6. Validate and benchmark the asset
  7. Publish the asset
  8. Consume the asset

Step 1: Create an asset

  1. Head to the Asset Studio module, click Create Asset then choose Generative AI.


  2. In the Generative AI window that appears, enter a unique Asset name, for example, “Automated Blog Content Generator” to easily identify it within the platform.


  3. Optional: Enter a brief description and upload an image to provide additional context or information about your Asset.
  4. In Type, choose the Conversational Agent.
  5. In Asset Visibility, choose any one of the following options.
    • All Users: Choose this option to share the asset with everyone in the workspace who has the appropriate permissions to view and manage the asset.
    • Private (default): Choose this option to ensure that only you, the owner, can view and manage the asset.
  6.  Click Create.

Step 2: Select a prompt template

  1. On the Generative AI Asset creation page that appears, choose Default Prompt template.


Step 3: Select a model and set model configurations

Select a Model

  1. Select a model from the available List, considering model size, capability, and performance. For more information about the model, see Model Capability Matrix.


Set Model Configuration

  1. Click and then set the following tuning parameters to optimize the model’s performance.  For more information, see Advance Configuration.

Step 4: Provide the system instructions

A system instruction refers to a command or directive provided to the model to modify its behavior or output in a specific way. For example, a system instruction might instruct the model to summarize a given text, answer a question in a specific format, or generate content with a particular tone or style.

  1. In the System Instructions section, enter the system instructions by crafting a prompt that guides the agent in generating the required content. 

Step 5: Run the model and view results 

  1. In the Debug and preview section,  enter the prompt for generating content in the query bar.


  2. Click or press Enter key to run the prompt. 


  3. Review the generated content to ensure it adequately addresses your expectation.


    • Click Reference if you wish to view the reference of the output.


    • Select the respective field information to view its reference.
  4. If necessary, provide examples to enhance the Conversational Agent understanding and response accuracy for generating content.

Note:  If the answer falls short of your expectations, provide additional context or rephrase your prompt for better clarification. You can also try changing to a different model.

Step 6: Validate and benchmark the asset

Benchmarking allows you to compare the performance of different models based on predefined metrics to determine the most effective one for your needs.

  1. In the Debug and preview section, click Benchmark.


  2. In the Benchmarks window that appears, click Start New to benchmark against predefined metrics to determine the most effective model.


Add Input and Expected Output

  1. On the Benchmark page,  click .
  2. In the Input and Expected output field that appears, enter the example input and the expected output.


  3. Click to add more Input and Expected output fields.

Add additional Benchmark

  1. On the Benchmark page that appears, click to add additional benchmarks.
     
  2. In the Benchmark window that appears, click Model and prompt Settings.


  3. In the Model and Prompt Settings window, choose another mode for the comparison.


  4. Click and adjust the metrics to optimize the model’s performance.  For more information, see Advance Configuration.
  5. Click Save to add the model for the Benchmark.

Validate

  1. On the Benchmark page, click the Re-run prompt.   


  2. In the Benchmark model section, you can get the response


  3. Compare the response of the models based on the tokens, score, latency and cost which will determine which is the best suited model to be deployed for your use case.
  4. Preview, like or dislike the results to notify fellow team members. 

Definition of Metrics

  1. On the benchmark page, click metrics. to define and adjust metrics settings.
  2. In the Metrics that appears, choose the following  metrics that you wish to compare with the models.
    • Cost: Cost refers to the financial expenditure associated with using the language model. Costs vary based on the number of tokens processed, the level of accuracy required, and the computational resources utilized.
    • Latency: Latency refers to the time delay between a user’s input and the model’s output.Latency can be influenced by various factors such as the complexity of the task, the model’s size, and the computational resources available. Lower latency indicates faster response times.
    • Tokens: “tokens used” typically refers to the number of these units processed to generate a response. Each token used consumes computational resources and may be subject to pricing.
    • Rough L: Rouge L calculates the longest common subsequence between the generated text and the reference text. It evaluates the quality of the generated text based on the longest sequence of words that appear in both texts, regardless of their order
    • Answer Similarity: Answer Similarity measures how similar the generated answers are to the reference answers. It can be computed using various similarity metrics such as cosine similarity, Jaccard similarity, or edit distance.
    • Accuracy:  Accuracy measures the correctness of the generated text in terms of grammar, syntax, and semantics. It evaluates whether the generated text conveys the intended meaning accurately and fluently, without errors or inconsistencies
  3. You can view the selected metrics against the models.

Step 7: Publish the asset

  1. Click Publish if the desired accuracy and performance for summarizing the content has been achieved.


  2. In the Asset Details page that appears, enter the Welcome Message and Conversation Starters.


  3. Click Publish and the status of the Asset changes to Published then it can be accessed in the Gen AI Studio.


Step 8: Consume the asset

  1.  Head to the Gen AI Studio module. Use the Search bar to find an Asset.  


  2. Select an Asset that you wish to consume.


  3. In the Conversational Assistant that appears, initiate a conversation by entering a prompt to generate content. An example could be “Write a Blog on how AI helps enterprises in driving operational efficiency”.


Conversational AI for Document Analysis


Businesses face the challenge of efficiently extracting quick answers from lengthy documents. The Purple Fabric platform powered by GenAI revolutionizes this landscape, offering a comprehensive solution by allowing you to have a conversation with your documents, getting on-demand information from documents of nearly any type or format. It not only enhances efficiency by promptly addressing a wide range of queries, allowing employees to focus on complex tasks, but also ensures consistency in responses across all customer interactions. Moreover, its scalability guarantees seamless handling of growing inquiry volumes without compromising quality.

Users must have the Gen AI User policy to access the question and answer capability.

This guide will walk you through the steps on how to get answers for questions from documents with the help of Purple Fabric.

  1. Create an asset
  2. Select a prompt template
  3. Select a model and set model configurations
  4. Provide the system instructions
  5. Run the model and view results
  6. Validate and benchmark the asset
  7. Publish the asset
  8. Consume the asset

Step 1: Create an asset

  1. Head to the Asset Studio module and click Create Asset.


  2. In the Create Gen AI asset window that appears, enter a unique Asset name, for example, “Budget_Facts_Finder” to easily identify it within the platform.


  3. Optional: Enter a brief description and upload an image to provide additional context or information about your Asset.
  4. In Type, choose the Conversational Agent and click Create.
  5. In Asset Visibility, choose any one of the following options.
    • Private (default): Choose this option to ensure that only you, the owner, can view and manage the asset. 
    • All users: Choose this option to share the asset with everyone in the workspace who has the appropriate permissions to view and manage the asset.
  6. Click Create to start the Asset creation.

Step 2: Select a prompt template

  1. On the Generative AI Asset creation page that appears, choose Default Prompt template.


Step 3: Select a model and set model configurations

Select a Model

  1. Select a model from the available List, considering model size, capability, and performance. For more information about the model, see Model Capability Matrix.


Set Model Configuration

  1. Click and then set the following tuning parameters to optimize the model’s performance.  For more information, see Advance Configuration.

Step 4: Provide the system instructions

A system instruction refers to a command or directive provided to the model to modify its behavior or output in a specific way. For example, a system instruction might instruct the model to summarize a given text, answer a question in a specific format, or generate content with a particular tone or style.

  1. In the System Instructions section, enter the system instructions by crafting a prompt that guides the agent in summarizing content. 


Step 5: Run the model and view results 

  1. In the Debug and preview section,  click  
  2. In the Knowledge files window that appears, upload the required documents that you wish to include and seek answers from.


  3. In the query bar, enter the prompt to seek answers from the document uploaded.


  4. Click or press Enter key to run the prompt.

  5. You can get the response based on your queries.


  6. If necessary, provide examples to enhance the conversational agent’s understanding and response accuracy for answering questions.

Note: If the answer falls short of your expectations, provide additional context or rephrase your prompt for better clarification. You can also try changing to a different model.

Step 6: Publish the asset

  1. If the desired accuracy and performance for getting answers from the document has been achieved, click Publish.


  2. In the Asset Details page that appears, enter the Welcome Message, Conversation Starters and Asset Disclaimer.


  3. Optional: Upload a sample image for a visual representation.
  4. Click Publish and the status of the Asset changes to Published. It can be accessed in the Asset Studio.


Build an Expert Agent


Business users can leverage the power of an assistant to streamline their workflow, increase efficiency, and ultimately enhance their ability to understand and serve their clients effectively. By harnessing the capabilities of an assistant to help manage emails, organize databases, and facilitate preparation for client meetings, financial advisors can save time and focus on what truly matters – building strong relationships and providing valuable financial advice. Join us as we dive into practical strategies and tools to optimize productivity and achieve success in the fast-paced world of financial planning.

Sample Use Case: While serving a client, partners often grapple with manually retrieving client details from emails, company databases, and appointment schedules to assess ISA allowances and provide tailored recommendations. This cumbersome process can be time-consuming and prone to errors. However, you can create an Advice Assistant to revolutionize this workflow by automating data retrieval and consolidation. With a simple client ID input, partners can instantly access comprehensive information, including past meetings and notes, ISA allowances and scheduled appointments, through the application. This automation enables partners to shift their focus from administrative tasks to delivering insightful recommendations and creating a more personalized client experience, ultimately elevating client engagement and satisfaction.

Users must have the Gen AI User policy to access the journey on how to build an expert agent. 

This guide will walk you through the steps on how to build an expert agent with the help of Purple Fabric.

  1. Create an asset
  2. Select a prompt template
  3. Select a model and set model configurations
  4. Provide the system instruction, action and examples
  5. Run the model and view results
  6. Validate and benchmark the asset
  7. Publish the asset
  8. Consume the asset

Step 1: Create an asset

  1. Head to the Gen AI Studio module and click Create Asset.


  2. In the Create Gen AI asset window that appears, enter a unique Asset name, for example, “Advice_Assistant” to easily identify it within the platform.


  3. Optional: Enter a brief description and upload an image to provide additional context or information about your Asset.
  4. In Type, choose the Conversational Agent and click Create.

Step 2: Select a prompt template

  1. On the Gen AI Asset creation page that appears, choose ReAct template.


    For more information on Default, RAG and ReAct templates, see Basics of Prompt Engineering course.

Step 3: Select a model and set model configurations

  1. Select a model from the available list, taking into account aspects such as model size and performance.


  2. Click and then set the following tuning factors/parameters to optimize its performance, if you wish to fine-tune the configurations of your Conversational Agent. 

Note: Initially, keep the factors at their default levels and run the prompt to assess if the answer aligns with your expectations. If you desire a more creatively crafted answer, consider increasing the temperature, top_p, and top_k slightly, as this may enhance the output. However, if the model begins to produce excessively quirky responses, maintain a high temperature while adjusting the top_p/top_k settings for more controlled results.


  • temperature: This parameter controls the level of randomness or creativity in the AI-generated text. Lower temperatures produce more conservative and predictable responses, while higher temperatures yield more diverse and unpredictable outputs.

  • top_k: This parameter limits the AI model to considering only the top k most probable words for each token generated, aiding in controlling the generation process. For example, setting top_k to 10 means only the top 10 most likely words will be considered for each word generated.

  • top_p: This parameter sets a threshold for cumulative probability during word selection, refining content by excluding less probable words. For example, setting top_p to 0.7 ensures words contributing to at least 70% of likely choices are considered, refining responses.

Step 4: Provide the system instructions, Knowledge Base and Examples

Provide System Instructions 

A system instruction refers to a command or directive provided to the model to modify its behavior or output in a specific way. For example, a system instruction might instruct the model to summarize a given text, answer a question in a specific format, or generate content with a particular tone or style.

  1. Enter the system instructions by crafting a prompt that guides the agent in helping advisors.


Add Actions

  1. In the Actions, click on Add.


  2. In the Actions window that appears,  use the Search bar to find the required tools. For example, Advisor meeting details 1, client and plan details and Get IST Time and click Add.


  3. After adding the tool, provide a description so that LLM can understand the context better.


Provide Examples

  1. Examples help the content creation task at hand to enhance the agent’s understanding and response accuracy. These examples help the agent learn and improve over time.

  2. In the Examples section, click Add. 


  3. Enter the example Question, Thought, Action, Action Input, Observation, Thought and Final Answer.


Step 5: Run the model and view results

  1. In the Debug and Preview section, enter the prompt in the query bar to seek the required answers.


  2. Click or press Enter key to run the prompt. 


  3. Review the generated response to ensure it adequately addresses or clarifies your query.
  4. If necessary, provide examples to enhance the conversational agent’s understanding and response accuracy for answering questions.

Note: If the answer falls short of your expectations, provide additional context or rephrase your prompt for better clarification.

Step 6: Validate and benchmark the asset

  1. In the Debug and preview section, click Benchmark.


  2. In the Benchmarks window that appears, click Start New to benchmark against predefined metrics to determine the most effective model.


  3. In the Input and Expected output , enter the example input and the expected output.


  4. Click to add another model to benchmark the response against.


  5. Click and adjust the metrics such as temperature, top_k and top_p as required to compare the output of the models against each other.


  1. Click Re-run prompt. 


  2. Compare the response of the models based on the tokens, score, latency and cost which will determine which is the best suited model to be deployed for your use case.
  3. Preview, like or dislike the results to notify fellow team members. 

Definition of Metrics

  • “tokens used” typically refers to the number of these units processed to generate a response. Each token used consumes computational resources and may be subject to pricing.
  • The score refers to the accuracy percentage which can be evaluated by comparing the model’s responses to a set of reference answers.
  • Latency refers to the time delay between a user’s input and the model’s output.Latency can be influenced by various factors such as the complexity of the task, the model’s size, and the computational resources available. Lower latency indicates faster response times.
  • Cost refers to the financial expenditure associated with using the language model. Costs vary based on the number of tokens processed, the level of accuracy required, and the computational resources utilized. 

Step 7: Publish the asset

  1. If the desired accuracy and performance for getting answers from the document has been achieved, click Publish.


  2. In the Asset Details page that appears, enter the Welcome Message, Conversation Starters and Asset Disclaimer.


  • Name:Advice_Assistant_Asset
  • Description: This asset is an intelligent advice assistant.
  • Welcome Message: Welcome to the Advice Assistant for Advisors and Partners! Here, we empower you with the tools and information you need to excel in client meetings and planning sessions. Whether you’re looking for data, insights, or strategies, I’m here to assist you every step of the way. Let’s collaborate to ensure your clients receive the best guidance and solutions tailored to their needs. Your success is our priority!
  • Conversation starters:
    • “What are the client and plan details related to ISA product for all the clients who has meeting with advisor “999999X”” 
    • “What are remaining allowance details for plans related to ISA product for all the clients who has meeting with advisor “999999X”. Show me the output in a tabular format including the details Client Name, Client Address, Plan Number, Remaining Allowance”
    • “For all clients meeting with advisor “999999X” today, how many clients have plans with ISA product?” 
    • Asset Disclaimer:  This Asset  provides responses based on the the tools that get time, client details and advisor details. While every effort is made to ensure accuracy, the information should be used as a supplementary guide and may not always reflect the most updated or specific details.
  1. Optional: Upload a sample image for a visual representation.
  2. Click Publish and the status of the Asset changes to Published then it can be accessed in the Gen AI Studio.


Step 8: Consume the asset

  1.  Head to the GenAI Studio module. Use the Search bar to find an Asset.  


  2. Select an Asset that you wish to consume.


  3. In the Conversational Assistant that appears, initiate a conversation by asking the asset a question based on your documents. An example could be “show remaining allowance details for ISA products for all the clients that the advisor “999999X” meeting today?”

Conversational AI for Enterprise Data


Businesses confront the challenge of swiftly extracting concise answers from extensive and numerous documents. The Purple Fabric platform, powered by Gen AI, disrupts this scenario, presenting a holistic solution by enabling users to engage in dialogues with their documents, irrespective of their types or formats. Enterprises can establish a Knowledge Base within the Purple Fabric platform, utilizing it as a document repository optimized for effortless search and retrieval. This repository encompasses a diverse range of documents and formats, ensuring users can promptly access pertinent information. By harnessing this capability, businesses empower themselves to efficiently extract quick answers from lengthy documents, thereby streamlining operations and enabling employees to focus on more intricate tasks. Additionally, the platform ensures consistency in responses across all customer interactions, thereby enhancing the quality of service provided. Its scalability feature further guarantees seamless handling of growing inquiry volumes, while still delivering accurate and relevant responses

Users must have the Gen AI User policy to access the question and answer capability with a Knowledge Base.  

This guide will walk you through the steps on answering questions with a Knowledge Base with the help of Purple Fabric.

  1. Create an asset
  2. Select a prompt template
  3. Select a model and set model configurations
  4. Provide the system instruction, knowledge base and examples
  5. Run the model and view results
  6. Validate and benchmark the asset
  7. Publish the asset
  8. Consume the asset

Step 1: Create an asset

  1. Head to the Gen AI Studio module and click Create Asset.


  2. In the Create Gen AI asset window that appears, enter a unique Asset name, for example, “Question_Answering_with_Knowledge_base” to easily identify it within the platform.


  3. Optional: Enter a brief description and upload an image to provide additional context or information about your Asset.
  4. In Type, choose the Conversational Agent and click Create.

Step 2: Select a prompt template

  1. On the Gen AI Asset creation page that appears, choose RAG Prompt Template.


Step 3: Select a model and set model configurations

Select a Model

  1. Select a model from the available List, considering model size, capability, and performance. For more information about the model, see Model Capability Matrix.


Set Model Configuration

  1. Click and then set the following tuning parameters to optimize the model’s performance.  For more information, see Advance Configuration.

Step 4: Provide the system instructions, knowledge base and examples

Provide System Instructions 

A system instruction refers to a command or directive provided to the model to modify its behavior or output in a specific way. For example, a system instruction might instruct the model to summarize a given text, answer a question in a specific format, or generate content with a particular tone or style.

  1. In the System Instructions section, enter the system instructions by crafting a prompt that guides the agent in generating content.

Add Knowledge Base

  1. In the Knowledge Base section, Click  Add. 


  2. In the Knowledge window that appears, click Add  to incorporate the Knowledge Base containing the required documents. This provides the necessary information for the agent to extract relevant and accurate data. 


Provide Examples

Examples help the content creation task at hand to enhance the agent’s understanding and response accuracy. These examples help the agent learn and improve over time.

  1. In the Examples section, click Add. 


  2. Enter the example Context, Question and Answer.


Step 5: Run the model and view results 

  1. In the Debug and preview section,  click   .
  2. In the Knowledge files window that appears, upload the required documents that you wish to include and seek answers from.


  3. In the query bar, enter the prompt to seek answers from the document uploaded.


  4. Click or press Enter key to run the prompt.


  1. Review the generated response to ensure it adequately addresses or clarifies your query.


  2. Click Reference if you wish to view the reference of the output.


  3. If necessary, provide examples to enhance the conversational agent’s understanding and response accuracy for answering questions.

Note: If the answer falls short of your expectations, provide additional context or rephrase your prompt for better clarification. You can also try changing to a different model.

Step 6: Validate and benchmark the asset

Benchmarking allows you to compare the performance of different models based on predefined metrics to determine the most effective one for your needs.

  1. In the Debug and preview section, click Benchmark.

     
  2. In the Benchmarks window that appears, click Start New to benchmark against predefined metrics to determine the most effective model.


Add Input and Expected Output

  1. On the Benchmark page,  click
  2. In the Input and Expected output field that appears, enter the example input and the expected output.


  3. Click to add more Input and Expected output fields.

Add additional Benchmark

  1. On the Benchmark page that appears, click to add additional benchmarks.
     
  2. In the Benchmark window that appears, click Model and prompt Settings.


  3. In the Model and Prompt Settings window, choose another mode for the comparison.


  4. Click and adjust the metrics to optimize the model’s performance.  For more information, see Advance Configuration.
  5. Click Save to add the model for the Benchmark.

Validate

  1. On the Benchmark page, click the Re-run prompt.    


  2. In the Benchmark model section, you can get the response


  3. Compare the response of the models based on the tokens, score, latency and cost which will determine which is the best suited model to be deployed for your use case.
  4. Preview, like or dislike the results to notify fellow team members. 

Definition of Metrics

  1. On the benchmark page, click metrics. to define and adjust metrics settings.
  2. In the Metrics that appears, choose the following  metrics that you wish to compare with the models.
    • Cost: Cost refers to the financial expenditure associated with using the language model. Costs vary based on the number of tokens processed, the level of accuracy required, and the computational resources utilized.
    • Latency: Latency refers to the time delay between a user’s input and the model’s output.Latency can be influenced by various factors such as the complexity of the task, the model’s size, and the computational resources available. Lower latency indicates faster response times.
    • Tokens: “tokens used” typically refers to the number of these units processed to generate a response. Each token used consumes computational resources and may be subject to pricing.
    • Rough L: Rouge L calculates the longest common subsequence between the generated text and the reference text. It evaluates the quality of the generated text based on the longest sequence of words that appear in both texts, regardless of their order
    • Answer Similarity: Answer Similarity measures how similar the generated answers are to the reference answers. It can be computed using various similarity metrics such as cosine similarity, Jaccard similarity, or edit distance.
    • Accuracy:  Accuracy measures the correctness of the generated text in terms of grammar, syntax, and semantics. It evaluates whether the generated text conveys the intended meaning accurately and fluently, without errors or inconsistencies
  3. You can view the selected metrics against the models.

Step 7: Publish the asset

  1. If the desired accuracy and performance for getting answers from the document has been achieved, click Publish.


  2. In the Asset Details page that appears, enter the Welcome Message, Conversation Starters and Asset Disclaimer.


  3. Optional: Upload a sample image for a visual representation.
  4. Click Publish and the status of the Asset changes to Published then it can be accessed in the Gen AI Studio.


Step 8: Consume the asset

  1.  Head to the GenAI Studio module. Use the Search bar to find an Asset.  


  2. Select an Asset that you wish to consume.


  3. In the Conversational Assistant that appears, initiate a conversation by asking the asset a question based on your documents. An example could be “What are the steps Unilever has taken to be more sustainable in 2021?”


Data Summarization


Enterprises are inundated with vast amounts of data and textual content from various sources such as reports, articles, emails, and social media. This abundance of information makes it challenging for decision-makers to extract relevant insights efficiently. Time constraints hinder comprehensive review of lengthy documents, impeding timely decision-making processes. Traditional summarization methods lack contextual understanding, leading to inaccuracies and incomplete insights from textual content. 

Purple Fabric revolutionizes content summarization by thoroughly analyzing text and producing succinct summaries. Unlike conventional methods, it grasps context and subtleties, offering precise insights across different content forms. Purple Fabric marks a significant advancement in extracting valuable information from data, empowering business users to navigate through extensive content effortlessly.

Users must have the Gen AI User policy to access the content summarization capability. 

This guide will walk you through the steps on how to create a Summarization Agent.

  1. Create an asset
  2. Select a prompt template
  3. Select a model and set model configurations
  4. Provide the system instructions
  5. Run the model and view results
  6. Validate and benchmark the asset
  7. Publish the asset
  8. Consume the asset

Step 1: Create an asset

  1. Head to the Asset Studio module and click Create Asset.


  2. In the Generative AI asset window that appears, enter a unique Asset name, for example, “Research Paper Summarizer” to easily identify it within the platform.


  3. Optional: Enter a brief description and upload an image to provide additional context or information about your Asset.
  4. In Type, choose Conversational Agent
  5. In Asset Visibility, choose any one of the following options.
  6. All Users: Choose this option to share the asset with everyone in the workspace who has the appropriate permissions to view and manage the asset.and click Create.

Step 2: Select a prompt template

  1. On the Generative AI Asset creation page that appears, choose Default Prompt template.


Step 3: Select a model and set model configurations

Select a Model

  1. Select a model from the available List, considering model size, capability, and performance. For more information about the model, see Model Capability Matrix.


Set Model Configuration

  1. Click and then set the following tuning parameters to optimize the model’s performance.  For more information, see Advance Configuration.

Step 4: Provide the system instructions

A system instruction refers to a command or directive provided to the model to modify its behavior or output in a specific way. For example, a system instruction might instruct the model to summarize a given text, answer a question in a specific format, or generate content with a particular tone or style.

  1. In the System Instructions section, enter the system instructions by crafting a prompt that guides the agent in summarizing content. 


Step 5: Run the model and view results 

  1. In the Debug and preview section,  click  
  2. In the Knowledge files window that appears, upload the required documents that you wish to summarize.


  3. In the query bar, enter the prompt for summarizing and seeking answers within the document.


  4. Click or press Enter key to run the prompt.
  5. You can get the response based on your queries.


  6. If necessary, provide examples to enhance the conversational agent’s understanding and response accuracy for summarizing content.

Note: If the answer falls short of your expectations, provide additional context or rephrase your prompt for better clarification. You can also try changing to a different model.

Step 6: Validate and benchmark the asset

  1. In the Debug and preview section, click Benchmark.


  2. In the Benchmarks window that appears, click Start New to benchmark against predefined metrics to determine the most effective model.


Add Input and Expected Output

  1. On the Benchmark page,  click .
  2. In the Input and Expected output field that appears , enter the example input and the expected output.


  3. Click to add more Input and Expected output fields. 

Add additional Benchmark

  1. On the Benchmark page that appears, click to add additional benchmark. 
  2. In the Benchmark window that appears, click Model and prompt Settings.


  3. In the Model and Prompt Settings window, choose another mode for the comparison and then click Save.


  4. Click and adjust the metrics to optimize the model’s performance.  For more information, see Advance Configuration.

  5. Click Save to add the model for the Benchmark.

Validate

  1. On the Benchmark page, click the Re-run prompt.    


  2. You can view the response in the Benchmark model section.  


  3. Compare the model’s response based on the tokens, score, latency and cost to decide which model is the most suited for deployment in your Use case.
  4. Preview, like or dislike the results to notify fellow team members. 

Definition of Metrics

  1. On the benchmark page, click metrics. to define and adjust metrics settings.
  2. In the Metrics that appears, choose the following  metrics that you wish to compare with the models.
    • Cost: Cost refers to the financial expenditure associated with using the language model. Costs vary based on the number of tokens processed, the level of accuracy required, and the computational resources utilized.
    • Latency: Latency refers to the time delay between a user’s input and the model’s output.Latency can be influenced by various factors such as the complexity of the task, the model’s size, and the computational resources available. Lower latency indicates faster response times.
    • Tokens: “tokens used” typically refers to the number of these units processed to generate a response. Each token used consumes computational resources and may be subject to pricing.
    • Rough L: Rouge L calculates the longest common subsequence between the generated text and the reference text. It evaluates the quality of the generated text based on the longest sequence of words that appear in both texts, regardless of their order
    • Answer Similarity: Answer Similarity measures how similar the generated answers are to the reference answers. It can be computed using various similarity metrics such as cosine similarity, Jaccard similarity, or edit distance.
    • Accuracy:  Accuracy measures the correctness of the generated text in terms of grammar, syntax, and semantics. It evaluates whether the generated text conveys the intended meaning accurately and fluently, without errors or inconsistencies
  3. You can view the selected metrics against the models.

Step 7: Publish the asset

  1. Click Publish if the desired accuracy and performance for summarizing the content has been achieved.


  2. In the Asset Details page that appears, enter the Welcome Message and Conversation Starters.


  3. Optional: Upload a sample image for a visual representation.
  4. Click Publish and the status of the Asset changes to Published. It can be accessed in the Asset Studio.


Step 8: Consume the asset

  1.  Head to the Asset Studio module. Use the Search bar to find an Asset.  


  2. Select an Asset that you wish to consume.


  3. In the Summarization Assistant that appears, initiate a conversation by asking it to summarize the desired content. For example,  “Could you please provide summaries of financial reports of central banks in Asia?


  • « Go to Previous Page
  • Page 1
  • Page 2
  • Page 3
  • Page 4
  • Page 5
  • Page 6
  • Interim pages omitted …
  • Page 10
  • Go to Next Page »

© ­Intellect Design Arena Ltd,