
An enterprise platform powered by Gen AI with automated extraction capabilities streamlines document handling for users. Utilizing Artificial Intelligence, the platform automatically identifies and extracts relevant data from various sources, reducing manual efforts and minimizing errors. This enables business users to perform easy and efficient extraction, saving time, improving data accuracy, and boosting overall productivity.
Users must have the Gen AI User policy to access the extraction capability.
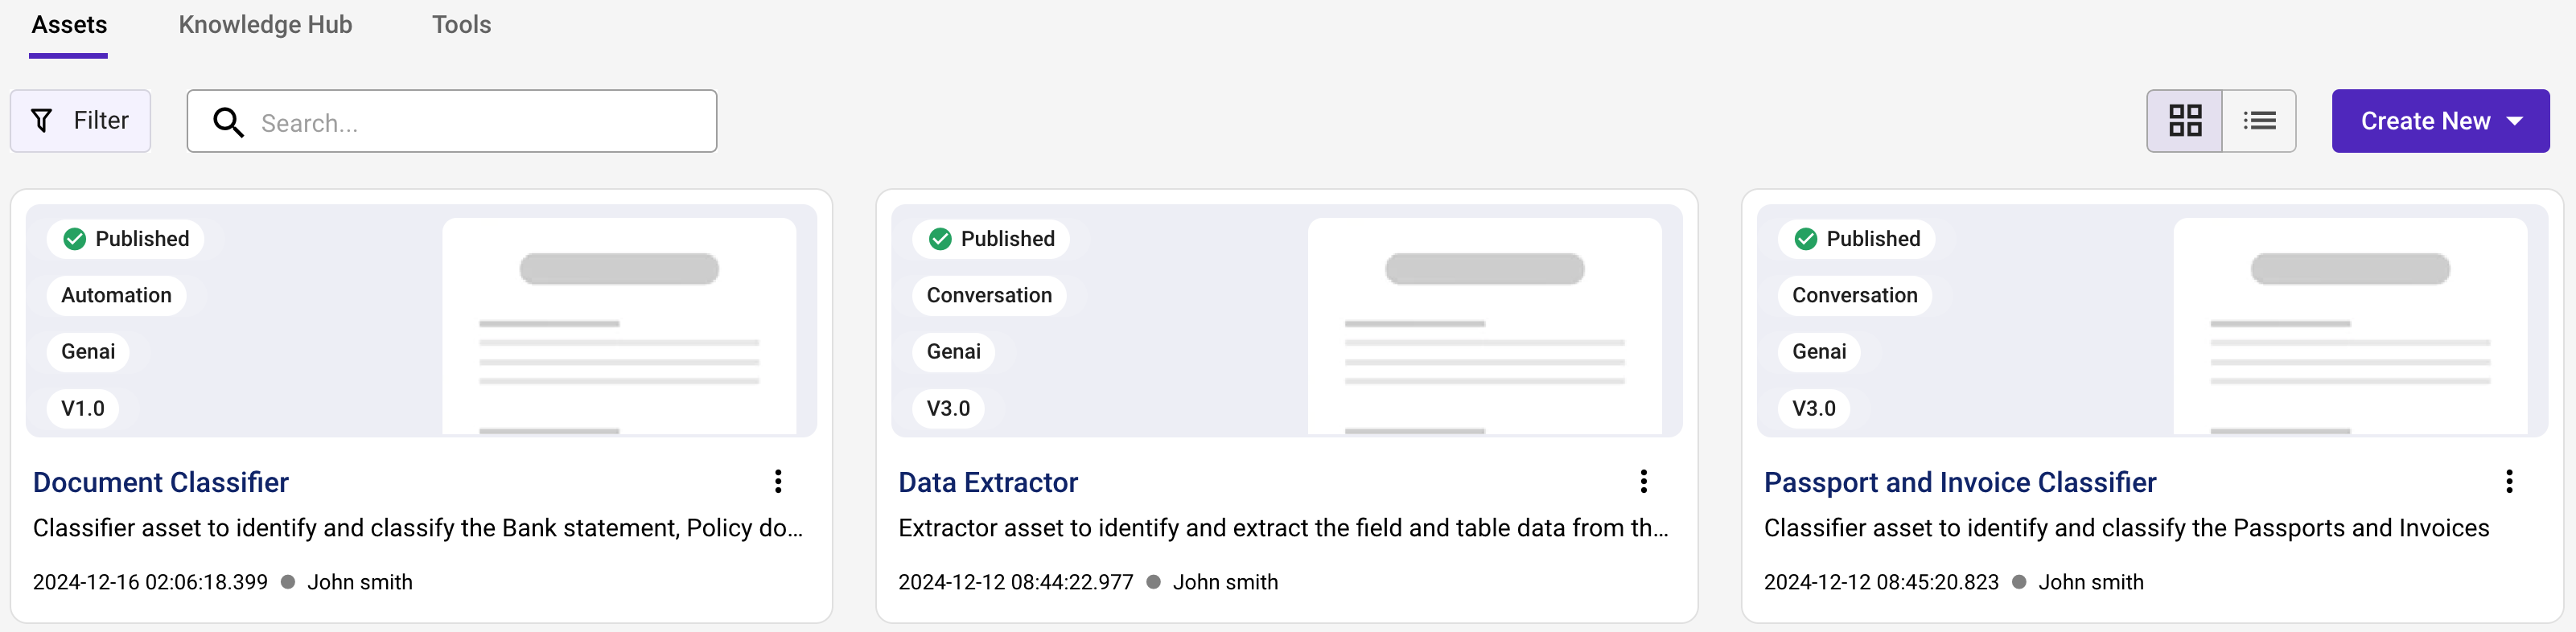
This guide will walk you through the steps on how to create an Extraction Agent.
- Create an asset
- Select a prompt template
- Select a model and set model configurations
- Provide the system instructions, parameters, output schema and examples
- Run the model and view results
- Publish the asset
Step 1: Create an asset
- Head to the Asset Studio module and click Create new and choose Generative AI.
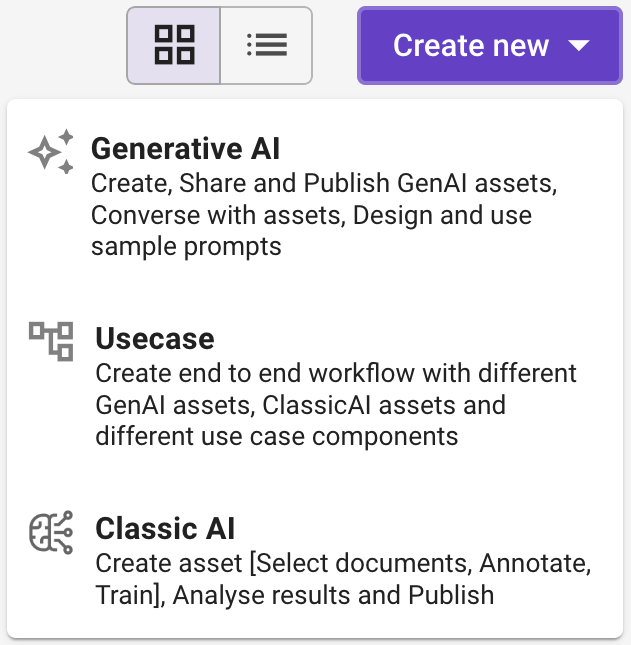
- In the Generative AI window that appears, enter a unique Asset name, for example, “NACH Mandate Extractor” to easily identify it within the platform.

- Optional: Enter a brief description and upload an image to provide additional context or information about your Asset.
- In Type, choose the Automation Agent and click Create.
- In Asset Visibility, choose any one of the following options.
- Private (default): Choose this option to ensure that only you, the owner, can view and manage the asset.
- All Users : Choose this option to share the asset with everyone in the workspace who has the appropriate permissions to view and manage the asset.
- Click Create to start the Extractor Asset creation.
Step 2: Select a prompt template
- On the Generative AI Asset creation page that appears, choose Default Prompt template.

Step 3: Select a model and set model configurations
Select a Model
- Select a model from the available List, considering model size, capability, and performance. For more information about the model, see Model Capability Matrix.

Set Model Configuration
- Click
and then set the following tuning parameters to optimize the model’s performance. For more information, see Advance Configuration.
Step 4: Provide the system instructions, parameters, output schema and examples
Provide System Instructions
A system instruction refers to a command or directive provided to the model to modify its behavior or output in a specific way. For example, a system instruction might instruct the model to summarize a given text, answer a question in a specific format, or generate content with a particular tone or style.
- Enter the system instructions by crafting a prompt that guides the agent in extracting the data.

Add Parameters
- In the Parameter section, click Add.

- Enter the following information.

- Click
 against the input parameter to access settings and add input field settings.
 - Choose the required file formats (PDF, JPEG, JPG, TIFF, PNG) from the drop-down menu.
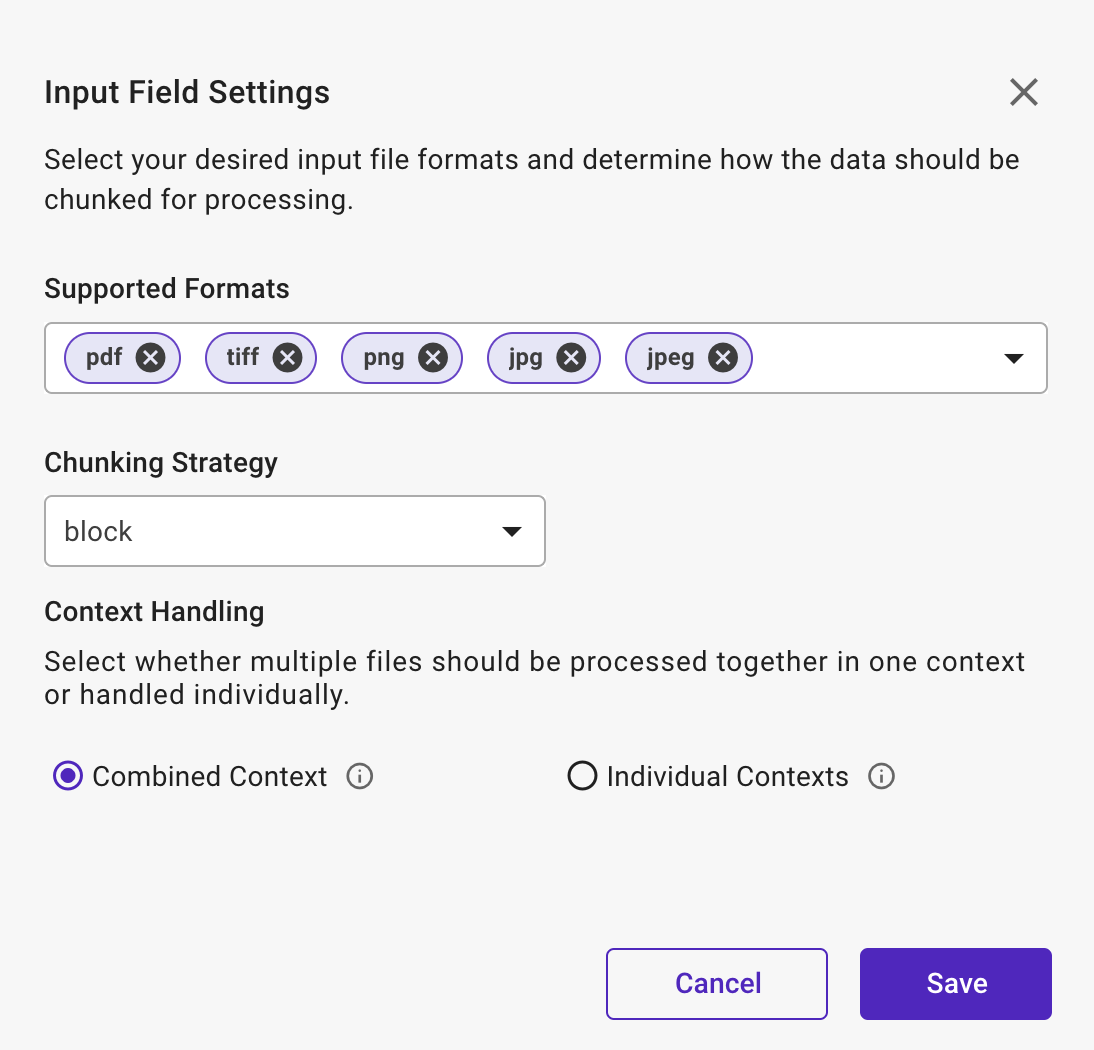
- Select a chunk strategy for file inputs. The chunking strategy can be applied in Page, Words, and Block.
- Choose any one of the following for Context Handling.
- Combined Context: Choose this option to process multiple files together as one, creating a unified context. This method provides a comprehensive view by considering the collective content.
- Individual Contexts: Choose this option to process individual contexts involving treating each file separately. This approach maintains the unique context of each file, allowing for detailed and isolated analysis.
- Combined Context: Choose this option to process multiple files together as one, creating a unified context. This method provides a comprehensive view by considering the collective content.
- Click Save to proceed.

Define Output Schema
- In the Output section, click Add to define the output schema for the Asset.
- Enter the Variable Name, Type and Description for each of the output variables. Supported types include Text, number, Boolean, DateTime.

Provide Examples
Examples help the summarization task at hand to enhance the agent’s understanding and response accuracy. These examples help the agent learn and improve over time.
- In the Examples section, click Add.
- Provide the Context and Answer in the example section.


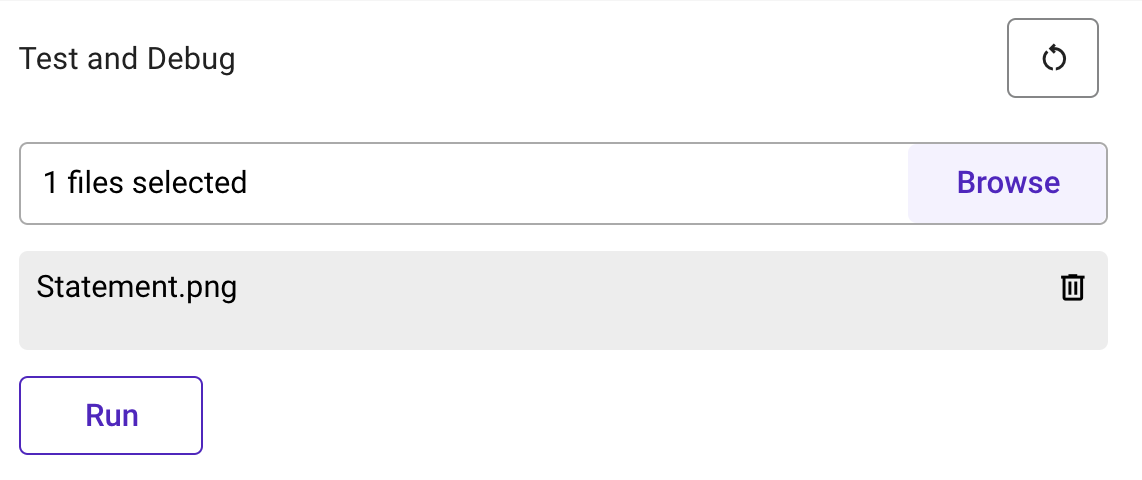
Step 5: Run the model and view results
- In the Debug and preview section, browse and add the required document.

- Upload the files based on the following format:
- File Upload Specification (Single File): The maximum size for a single file upload is 19 MB.
- File Upload Specification (Multiple File):
- File Upload Limit: Users can upload up to 10 files at a time.
- File Size Limit: The maximum size for each uploaded file is 11 MB. Users can upload up to a total combined size of 110 MB across 10 files.
- Supported File Formats: The system validates each file based on pre-defined accepted formats. Supported formats include: pdf, tiff, png, jpeg, jpg, doc, docx.
- Click Run to get the results for extraction in the required format.

- Review the generated output. Verify the extraction by checking the respective information for the output.

- You can also view the JSON Output

- Click Reference to view additional information or context about the extraction results, such as the source data, detailed explanations, and relevant metadata and select the respective References to view its information.

Note: If you are not satisfied with the results then, try modifying the System Instructions and the description of the output variables. You can also try changing to a different model
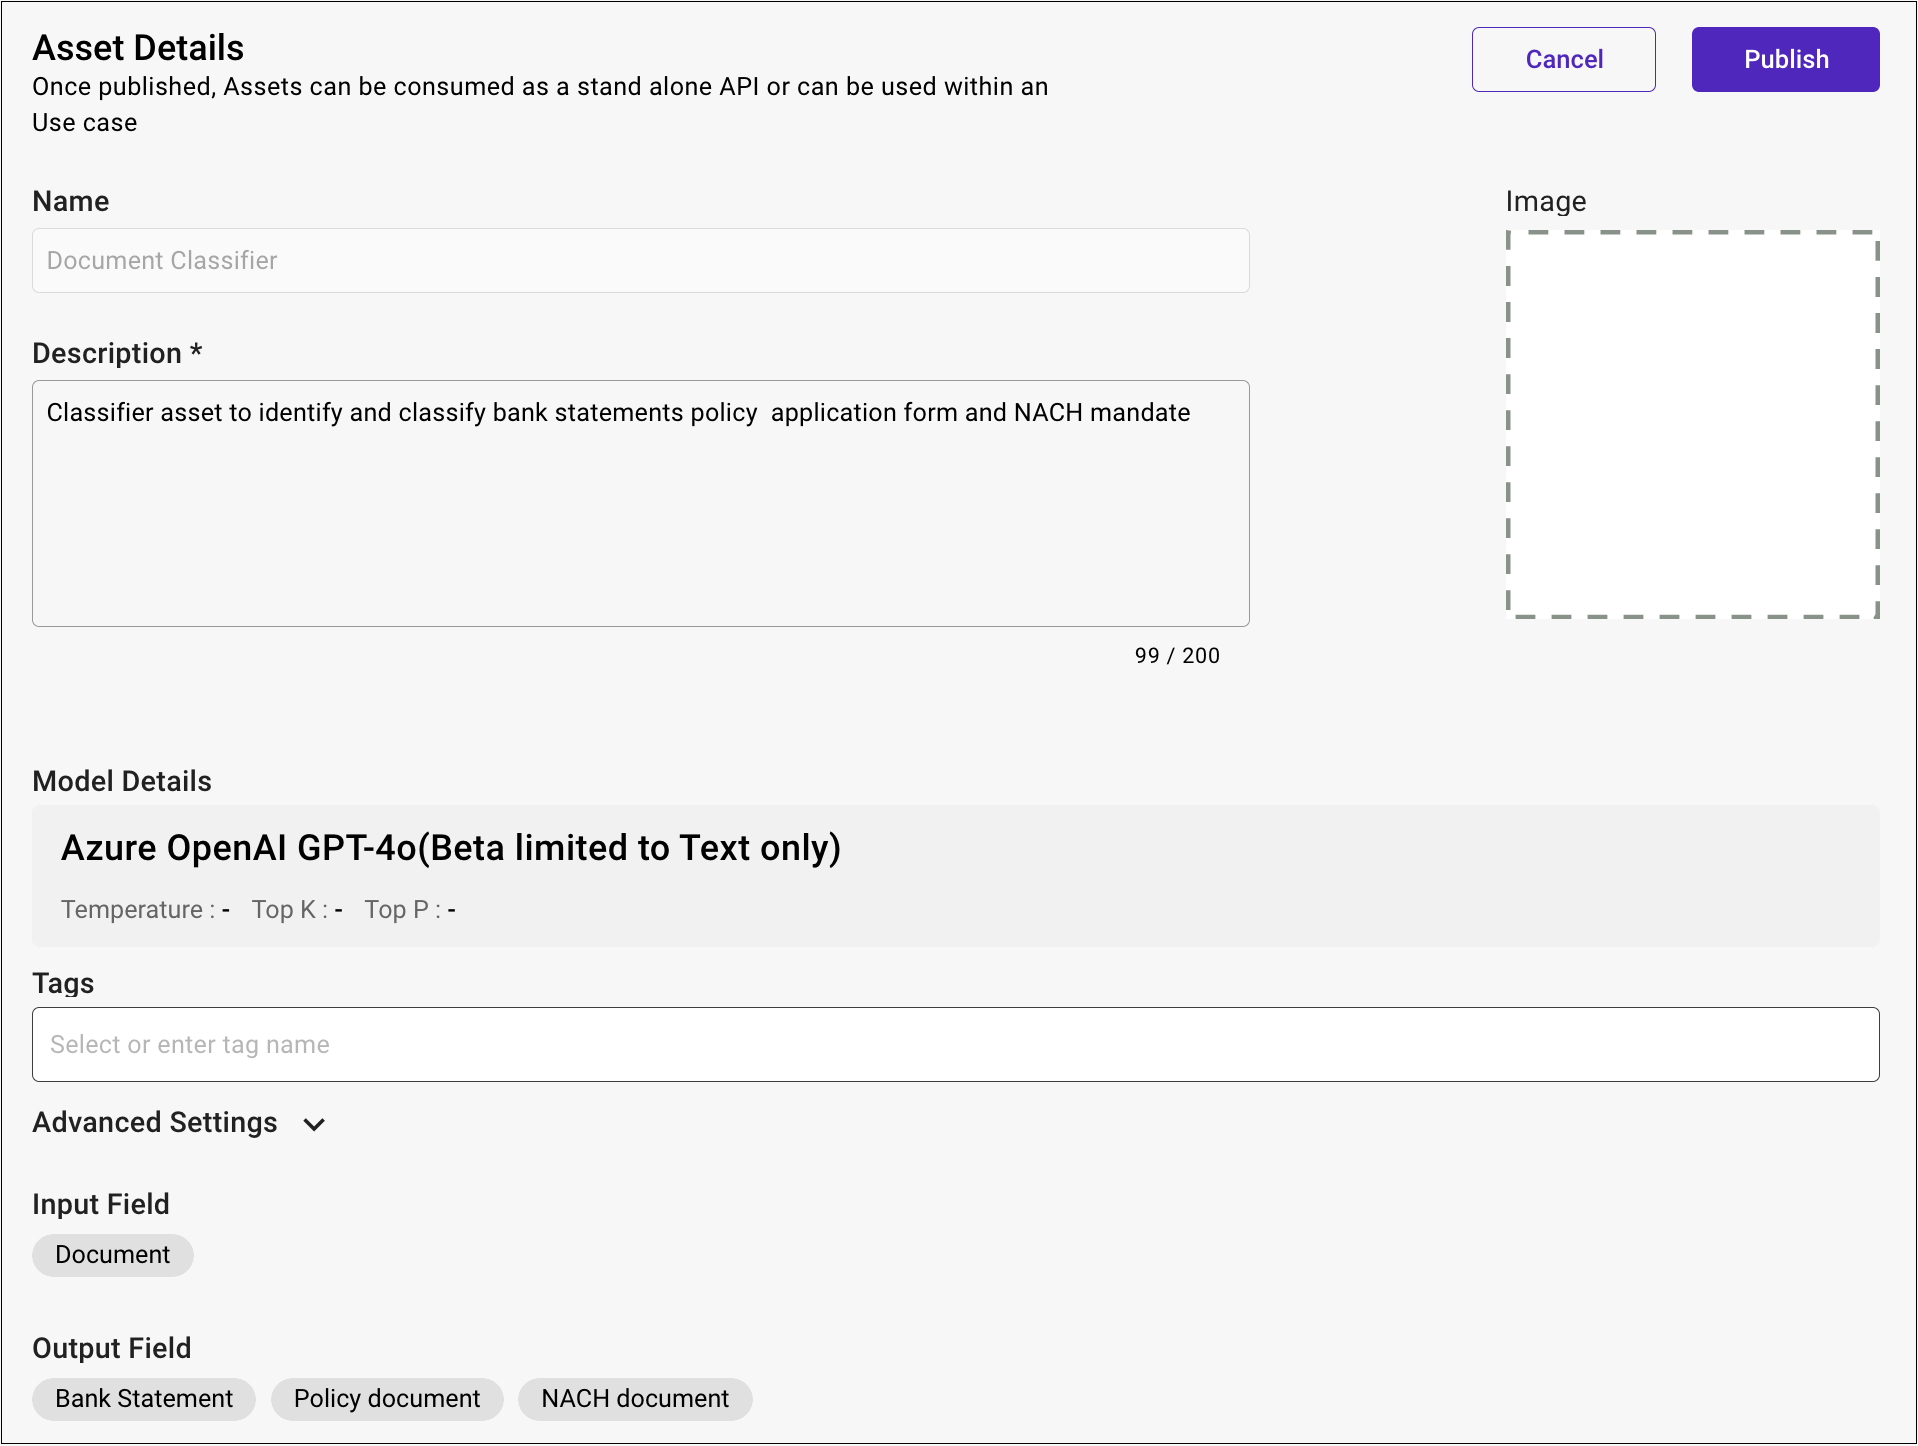
Step 6: Publish the asset
- Click Publish if the desired accuracy and performance for summarizing the content has been achieved.
- In the Asset Details page that appears, write a description and upload an image for a visual representation.

- Click Publish and the status of the Asset changes to Published then it can be accessed in the Asset Studio.


Note: Once the Asset is published, you can download the API and its documentation. The API can be consumed independently or used within a specific Use case. If you wish to consume this Asset via API, see Consume an Asset via API.
You can also consume this automation Asset in the Asset Monitor module. For more information, see Consume an Asset via Create Transaction.


 Configuration.


