• Skip to main content
Help Center

Help Center

Uncategorized

Fine-tune a Classifier Asset


Fine-tuning is the process of adjusting and optimising a trained Asset before it is published. This involves further training an Asset using an additional document set to boost its accuracy and confidence score.

To evaluate whether fine-tuning is necessary for an Asset, you can view the Accuracy Results page after Asset training is completed, which provides an overview of both correctly and incorrectly predicted document types. By doing this, you can identify patterns or areas where fine-tuning can potentially improve the Asset’s performance.

Note: Fine-tuning is only applicable for trained Assets before they are published, not to published Assets.

Users must have any one of the following policies to fine-tune a Classifier Asset:

  • Administrator Policy
  • Creator Policy

This guide will walk you through the steps on how to fine-tune a Classifier Asset.

  1. Consider scenarios for fine-tune 
  2. Upload documents 
  3. Initiate fine-tune
  4. Select documents
  5. Annotate and train
  6. Review results and validate
  7. Publish the asset

Step 1: Consider scenarios for fine-tune

The decision to fine-tune an Asset depends on your objectives, which are often specific Document types.

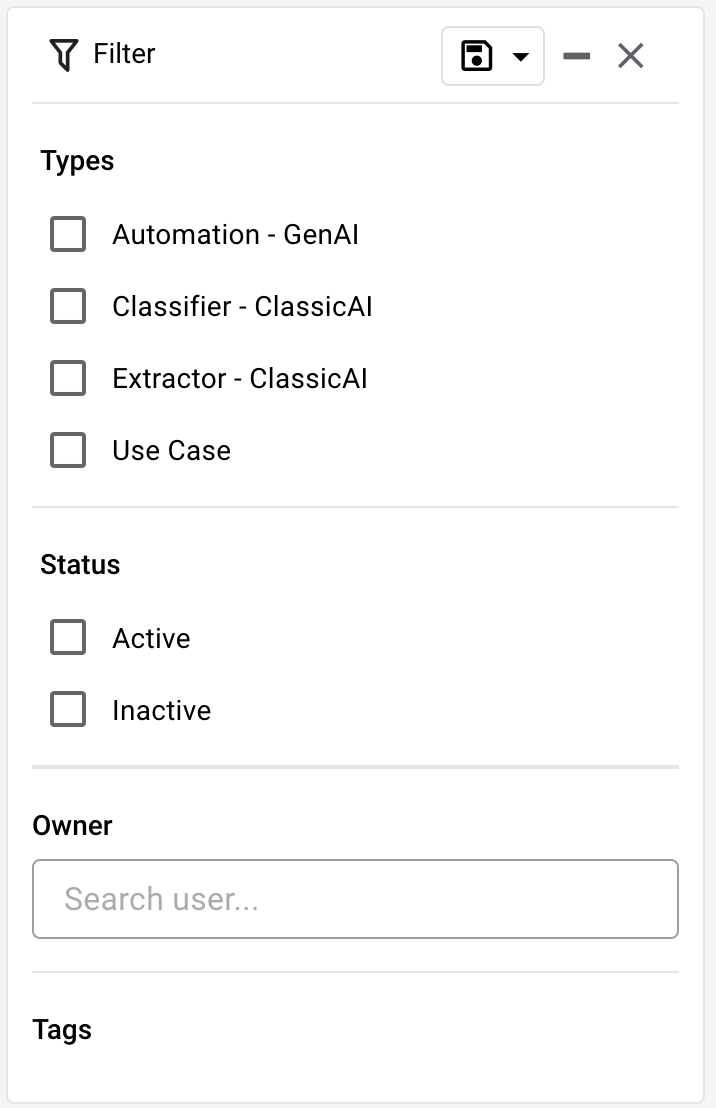
  1. Head to the Asset Studio page and select the trained Asset that you wish to fine-tune.


  2. In the Accuracy Results page that appears, check the Asset’s overall accuracy rate, Document type level accuracy and the confidence score.


Things to know

Document Type: In the context of Classifier Asset, a document type refers to the category or class that a document belongs to. For example, in a Classifier Asset, the document types could be “Invoice,” “Purchase Order,” “Receipt,” “Contract,” and more. Each of these represents a distinct category of documents. 

Document Variation: Document variation refers to the different variations or instances within a specific document type. For example, various invoices could have different layouts, formats, or styles depending on factors like the vendor, company, or industry standards. 

Overall Accuracy: The overall accuracy represents the percentage of correct predictions made by the Asset across all Document types.

Document type Accuracy: Document Type accuracy represents the percentage of correct predictions made by the Asset for individual Document types or categories in the test document set.

Confidence score: The confidence score is a measure of how confident the Asset is in its predictions for different Document types.

  1. You can consider fine-tuning the Asset in the following scenarios:
    • To improve the overall accuracy of the Asset: Consider fine-tuning the Asset when the overall accuracy of the Asset is low.
    • To improve the Document type level accuracy : Consider fine-tuning the Asset when the accuracy for a certain Document type is low.
    • To improve the accuracy for specific document variations: Consider fine-tuning the Asset for specific document variations with low accuracy. For example, if you’re creating a Classifier Asset to classify invoices and purchase orders, and you notice low accuracy or confidence scores for invoices from specific vendors or purchase orders in certain formats, then you can initiate fine-tuning.
    • To improve the confidence score: Consider fine-tuning the Asset when the confidence score for certain Document types or document variations is low. 

Step 2: Upload documents

After identifying areas for improvement in the Asset, it is recommended to have these required document sets for fine-tuning the Asset. If you have already uploaded the documents in Document Library, skip this step and proceed to Fine-tune.

Otherwise, upload the required documents in the Document Library. For more information about uploading documents, see Upload Documents.

Step 3: Initiate fine-tune

Note: It is important to be mindful that fine-tuning may also reduce the accuracy of the Asset when it is not properly performed with the appropriate document set and annotations.

  1. On the Accuracy Result page, click Fine-tune.


  2. In the Proceed to fine-tune window that appears, click Proceed.


Step 4: Select documents

  1. In the Document Sets pane, select or search for the document set.


  2. In the right page, select the required documents to fine-tune a Classifier Asset.


Note: Select a minimum of 10 documents to proceed for fine-tune. However, we recommend having a volume of 25 documents or more to provide a higher accuracy measure.

  1. Click Proceed to annotate the documents.

Step 5: Annotate and train

Annotation refers to the process of labelling documents against the Document types defined as part of the fine-tuning process.

For more information about annotating a Classifier Asset, see Annotate and Train.

Step 6: Review results and validate

This step allows you to assess the Asset’s predictions, accuracy, and confidence score. Additionally, you can utilise the Validate feature to evaluate the Classifier Asset’s performance on a new set of documents.

For more information on reviewing the results and validation, see Review results and validate.

Step 7: Publish the asset

If the desired accuracy has been achieved, you can proceed to Publish the Asset. For more information on publishing the Asset, see Publish the asset. 

January 2024


January 27, 2024

Version: 1.5.2.0

New


  • The “Auto Annotation” feature has been introduced in the Annotation page of the Asset Studio. Users can access this feature to significantly reduce the time and effort required for manually annotating documents.

  • The “Image” data type has been introduced in Document type. This feature allows the users to effortlessly capture images from the documents.

Updates


  • The “Page limitation (Specific pages)” feature has been introduced against an Extractor in Use case Asset. During Use case Asset creation, when users add an Extractor Asset to the workflow, this feature helps to specify the page(s) that needs to be considered for extraction rather than handling the entire document.

  • The “Page limitation (Specific pages)” feature has been introduced against a Classifier in Use case Asset. During Use case Asset creation, when users add a Classifier Asset to the workflow, this feature helps to specify the page(s) to decide the classification result rather than handling the entire document.

January 6, 2024

Version: 1.5.0.0

New


  • The “Rename” feature has been introduced for the Assets in the Asset Studio module. The Platform now allows users to modify or update the existing Asset names. For more information, see Rename an asset.

Updates


  • The “Create Transaction” feature has been enhanced, allowing users to upload documents and consume the following assets directly from the Asset Monitor module.
    • Extractor Asset
    • Use case Asset

For more information, see Consume an Asset via Create Transaction.  

  • The “View the document results and download the JSON output” feature has been introduced in the Asset Monitor module allowing users to view the extracted output in real-time for the following assets. Additionally, users have the flexibility to download the extracted output in JSON format.
    • Extractor Asset
    • Use case Asset

For more information, see View results and Download the JSON output.


Annotate a Table


Annotating a table refers to the process of adding labels to the elements within a table. This process is crucial for training an extractor asset to extract data from tables in a document, enhancing the model’s ability to accurately identify and extract relevant information. By providing clear labels, we improve the model’s understanding of the data, ensuring more effective and reliable extraction.

Users must have any one of the following policies to annotate a table:

  • Administrator Policy
  • Creator Policy
  • Annotator Policy

This guide will walk you through the steps below in the table annotation. 

  1. Know your document’s table format
  2. Annotate a table

Step 1: Know your document’s table format

Before you start annotating tables, you need to understand how to annotate tables based on their formats. The platform allows you to annotate the following types of tables:

  • Table on a single page 
  • Table spanning on multiple pages

Table on a single page

A table in a single page refers to a document structure where a page contains only one table, and doesn’t exceed to another page.

Example: In the images below, the table is confined to a single page, and does not extend to subsequent pages. 

Page 1
Page 2

Table spanning on multiple pages

A spanning table in a page refers to a document structure where a page contains a table that is too large to fit on a single page, and continues to the subsequent pages.

With this feature, users can consolidate and process multi-page tables more efficiently. When enabled, this feature will merge tables that span multiple pages, as long as they have the same number of columns. 

Example: In the images below, the table appears on the first page, and continues onto the subsequent pages. 

Page 1
Page 2

Step 2: Annotation a Table

The platform allows you to annotate the following types of tables:

  • Single table annotation
  • Table span annotation

Single table annotation

  1. In the Annotation screen, you can access the existing tables that were created in the document type against the extractor asset. 
  2. On the right side pane, select the table label that corresponds to the table you wish to annotate on the document.
  3. On the document, spot the target table information and draw a bounding box around the entire table.

    Drawing a Bounding box: Click and hold the mouse cursor at one corner of the table you wish to annotate. Then, drag the cursor to the opposite corner of the table while keeping the mouse button pressed. This action creates a rectangular box around the table. This is called a bounding box.

  4. Click on the intersections of the rows and columns to create grid lines that define the table’s structure. You can resize or move the lines to accurately capture the table’s layout and content.
  5. Select the appropriate column headers from the drop down menu.
  6. Click the Done & Read Table button displayed at the bottom of the page to capture and view the extracted table data.
  7. If the column headers and corresponding values are not extracted as intended, click button to remove the annotation.
  8. On the right side pane, click against the table field to start annotating another table instance in the document.
  9. Repeat the same steps to annotate the tables in the other documents. 
  10. Complete the annotation and click Train.

Table spanning annotation

  1. In the Annotation screen, you can access the existing tables that are created in the document type against the extractor asset. 
  2. On the right side pane, select the table label that corresponds to the table you wish to annotate on the document.
  3. On the document page, spot the target table information and draw a bounding box around the entire table information.

    Drawing a Bounding box: Click and hold the mouse cursor at one corner of the table you want to annotate. Then, drag the cursor to the opposite corner of the table while keeping the mouse button pressed. This action creates a rectangular box around the table. This is called a bounding box.
  1. Click on the intersections of the rows and columns to create grid lines that define the table’s structure. You can resize or move the lines to accurately capture the table’s layout. 
  2. Select the appropriate column headers from the drop down menu.
  3. Click the Done & Read Table button displayed at the bottom of the page to capture and view the extracted table data.
  4. Go to the next page where the table continues.


  5. On the document, spot the target table information and draw a bounding box around the entire table.
  6. Repeat the same steps to annotate  the table that continues on to the next page. 
  7. Once the entire table spanning across multiple pages is annotated, click   link table from the right side pane. This is used to connect or link tables that span multiple pages, ensuring coherent and accurate extraction of data across the entire table span.
  8. If the column headers and corresponding values are not extracted as intended, click button to remove the annotation.
  9. On the right side pane, click against the table field to start annotating another table instance in the document.
  10. Complete the annotation and click Train.

December 2023


December 5, 2023

Version: 1.4.0.0

New


  • The “Collapse/expand” feature has been introduced against the entities. Platform allows the users to collapse/expand the entity information during the annotation process.

  • The “Create Transaction” feature has been introduced to consume an asset from Asset Monitor. Platform allows the users to consume the Classifier Asset from the Asset Monitor module. For information, see Consume an Asset via Create Transaction page.  

  • The “View the document results and download the JSON output” feature has been introduced in the Asset Monitor module. The Platform allows users to view the result information and download the JSON Output for the Classifier Asset. For more information, see View the document results and download the JSON output.

  • The “View reason for failure” feature has been introduced in the Asset Monitor module. Platform allows the users to know the reason if a transaction fails. For more information, see Failed Transaction.

Updates


  • The “Table Annotation” feature has been enhanced to effortlessly annotate tables in documents that span over multiple pages. Users can view the results for documents with tables spanning multiple pages when they:
    • Train an Extractor Asset
    • Retrain an Extractor Asset
    • Try an Extractor Asset
    • Finetune an Extractor Asset
    • Validate an Extractor Asset

For more information, see Table spanning annotation.

  • The storage has been increased in the annotation process. Platform allows the users to perform more than 5000 annotations using the bounding boxes during the Annotation process.

Manage an Asset


Managing an Asset involves a range of actions aimed at modifying its name, Asset image, removing an unwanted Asset and downloading its API.

Users must have any one of the following policies to manage an Asset: 

  • Administrator Policy
  • Creator Policy

This guide will walk you through the below steps on how to manage an Asset using the following operations:

  • Rename an asset
  • Delete an asset
  • Upload an image
  • Download API

Rename an asset

Renaming an Asset refers to the action of assigning a new name to it. This process allows the users to modify the existing name and update it with a new one, facilitating better organisation and making it easier to locate the Asset within the platform. 

  1. Head to the Asset Studio page and use the Search bar to find an Asset. 


  2. Click on the Asset that you wish to rename, and then select Rename.


  3. In the Rename window that appears, update the Asset name, and then select OK.


  4. You can now view the updated Asset name for that Asset.


Delete an asset

  1. Head to the Asset Studio page and use the Search bar to find an Asset.


  2. Click on the Asset that you wish to delete and then select Delete.


Upload an image

  1. Head to the Asset Studio page and use the Search bar to find an Asset.


  2. Click on the Asset for which  you wish to update the image, and then select Update display image.


  3. In Update display image window that appears, click move the cursor on the image and click to upload an image from your local system.


  4. Click Done.
  5. You can now view the updated image against the Asset.


Download API 

After publishing an asset, you can download it as an API and integrate it with your business system.

Note: Download API feature is applicable only for the Published Assets.

  1. Head to the Asset Studio page and use the Search bar to find an Asset.


  2. Click on the Asset you wish to use and then select Download API.


  3. The API file will be automatically downloaded to your system. 

How to Find an Asset


Finding an Asset refers to the process of  locating and accessing a specific Asset. Once Asset creation is initiated in the Platform, you can easily search and access that Asset, saving valuable time.

This guide will walk you through the steps on how to find an Asset in following modules:

  • Asset Studio
  • Asset Monitor

Note: The private assets will be indicated with the symbol in the specified modules. Only the owner can view and manage the asset. Other users will not have access to these private assets unless the owner grants permission.

Asset Studio


Users must have any one of the following policies to find an Asset in Asset Studio:  

  • Administrator Policy
  • Creator Policy
  • Viewer Policy
  • Annotator Policy

You can find an asset using the following options:

  • Access the Search bar
  • Utilizing Filters

Access the search bar 

  1. Head to the Asset Studio module, locate the Search bar.


  1. In the Search bar, enter an Asset name that you wish to find.
  2. Press Enter.
  3. The platform will dynamically display relevant results as you enter.

Utilizing Filter

  1. On the Asset Studio module, click Filter and use the following options to get your required Asset(s).


  2. In Asset Types, choose the types of assets  you wish to filter.
    • Classifier – Classic AI: Choose this option to filter the classifier assets.
    • Extractor – Classific AI: Choose this option to filter the extractor assets.
    • Use case: Choose this option to filter the Use case assets.
  3. In Asset Status, choose the status of the asset you wish to filter.
    • Initiated: Choose this option to filter assets that have been initiated.
    • Creation in Progress: Choose this option to filter assets that are currently in the process of being created.
    • Publish in Progress: Choose this option to filter assets that are in the process of being published.
    • Published: Choose this option to filter assets that have been successfully published.
    • Publish Failed: Choose this option to filter assets that failed to publish.
    • Design in Progress: Choose this option to filter assets that are currently being designed.
    • Training in Progress: Choose this option to filter assets that are undergoing training.
    • Training Completed: Choose this option to filter assets that have completed training.
    • Training Failed: Choose this option to filter assets that failed during training.
    • Annotation in Progress: Choose this option to filter assets that are being annotated.
    • Annotation Failed: Choose this option to filter assets that failed during annotation.
    • Finetuning in Progress: Choose this option to filter assets that are being fine-tuned.
  4. In Users, select the user whose assets you wish to filter. You can use the search bar to find specific users.
  5. In Date modified, select the date time options to filter the assets within a specific period.
    • 24 Hrs: Choose this option to filter the assets created within 24 hours. 
    • Custom: Choose this option to filter the assets created within a custom date range. You can select both the Start and End dates to filter the assets.  


Save Filter
  1. This option allows you to save a specific filter criteria for easy reuse. It helps to quickly apply the same filter settings without setting them up each time.
     
  2. In the filter window, click and select Save as New Filter.


  3. In the Save Filter window that appears, enter the Filter name and click Save.


  4. The custom filter is saved and you can access the filter whenever you need. 
Reuse the saved Filter
  1. Reuse the Saved Filter
  2. In the filter option,  click and select the Saved filter and choose the saved filter to reuse.


Asset Monitor

Users must have any one of the following policies to find an Asset in Asset Monitor: 

  • Administrator Policy
  • Creator Policy
  • Manager Policy

You can find an Asset using the search bar.

Access the search bar 

  1. Head to the Asset Monitor module, locate the Search bar.


  1. In the Search bar, enter an Asset name that you wish to find and then press Enter.
  2. The platform will dynamically display relevant results as you enter.

Utilizing Filter

  1. On the Asset Monitor module, click Filter and use the following options to get your required Asset information to monitor.


  2. In Asset Types, choose the asset types that you wish to filter.
    • Classifier – Classic AI: Choose this option to filter the classifier assets.
    • Extractor – Classic AI: Choose this option to filter the extractor assets.
    • Use case: Choose this option to filter Use case assets.
       
  3. In Status, choose the status of the asset that you wish to filter.
    • Active: Choose this option to filter the assets that are in the Active state.
    • Inactive: Choose this option to filter the assets that are in the Inactive state.  
  4. In Owner, select the user whose assets you want to filter. You can use the search bar to find specific users.
  5. In Tags, select the tags to filter  assets that contain those tags.
  6. In Date modified, select the date time options to filter the assets that are within a specific period.
    • 24 Hrs: Choose this option to filter the assets created within the last 24 hours. 
    • Custom: Choose this option to filter the assets created within a custom date range. You can select both the start and end dates to apply the filter.


Save Filter

This option allows you to save specific filter criteria for easy reuse. It helps to quickly apply the same filter settings without setting them up each time. 

  1. In the Filter window, click and select Save as New filter.


  2. In the Save Filter window that appears, enter the Filter name and click Save.


  3. The custom filter is saved and you can access the filter whenever you need. 
Reuse the Saved Filter
  • In the Filter option,  click and select the Saved filter and choose the saved filter to reuse.


  • « Go to Previous Page
  • Page 1
  • Interim pages omitted …
  • Page 4
  • Page 5
  • Page 6
  • Page 7
  • Page 8
  • Interim pages omitted …
  • Page 10
  • Go to Next Page »

© ­Intellect Design Arena Ltd,